Using the Project Tabs
Every part of a project sits on six tabs: change a contact, upload documents, and find the Project GUID in a few clicks.
Quick Reference
Jobs tracks inspections; Overview holds the parties and address.
Change a borrower or contractor in Overview › Parties & Contacts › Edit.
Upload files on the Documents tab.
Copy the Project GUID from the System tab for support.
Before You Start
You have opened the project from the Dashboard.
Step 1 — Know the Six Tabs
Jobs, Overview, Budget, Documents, System, Workflow
Jobs: order and track every inspection. Overview: parties, address, and property details. Budget: the lines inspectors draw against. Documents: contracts, plans, appraisals, and insurance. System: the Project GUID. Workflow: recurring orders and status alerts.

Step 2 — Change a Borrower or Contractor
Search and select the new contact
Open Overview and click Edit on Parties & Contacts. Search by name, select the record, and click Save. Every future notice and order goes to the new contact.
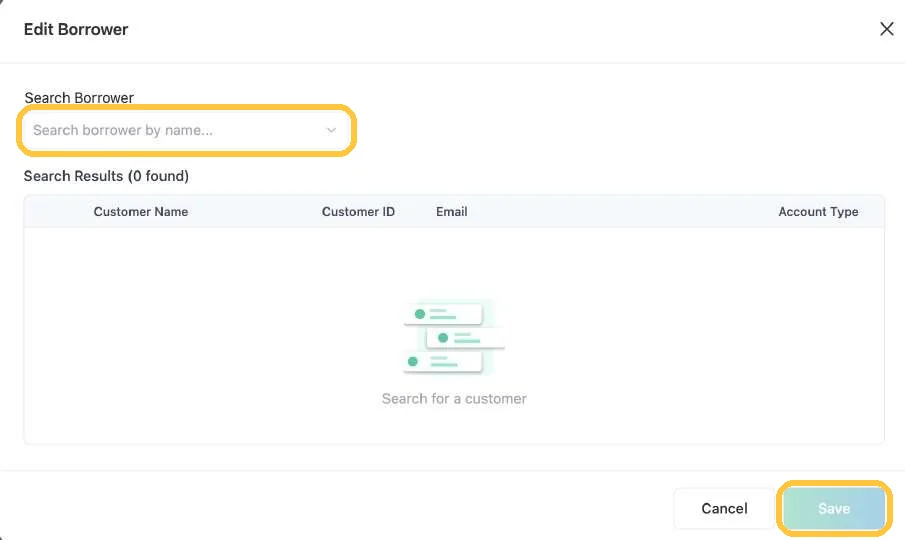
The person must already exist in People.
Step 3 — Upload a Document
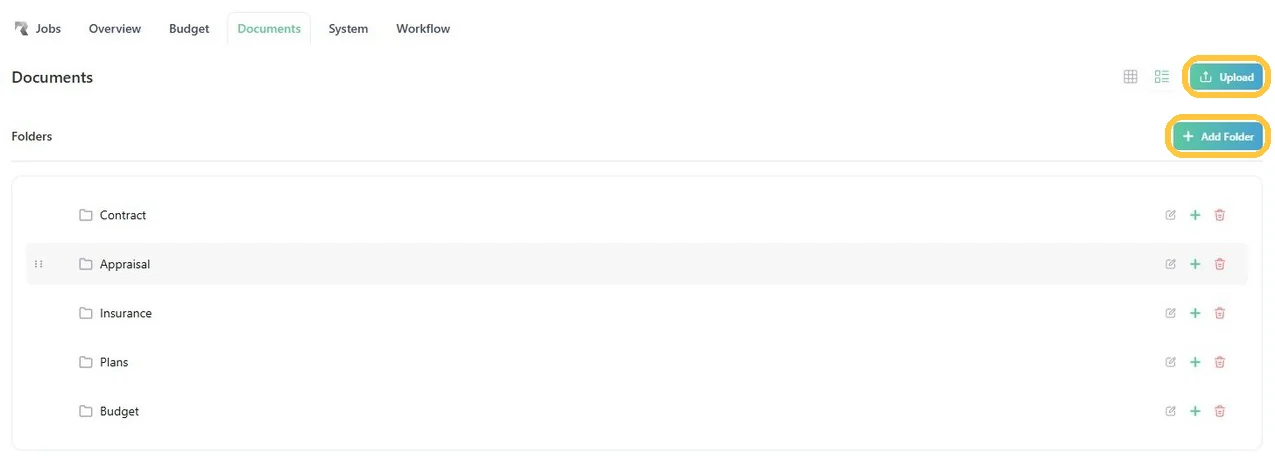
Click Upload
Click Upload, or drag the file onto a folder. Pick the folder: Insurance, Budget, Contract, Plans, or Appraisal. Click + Add Folder to build your own folders and subfolders.
Step 4 — Find the Project GUID
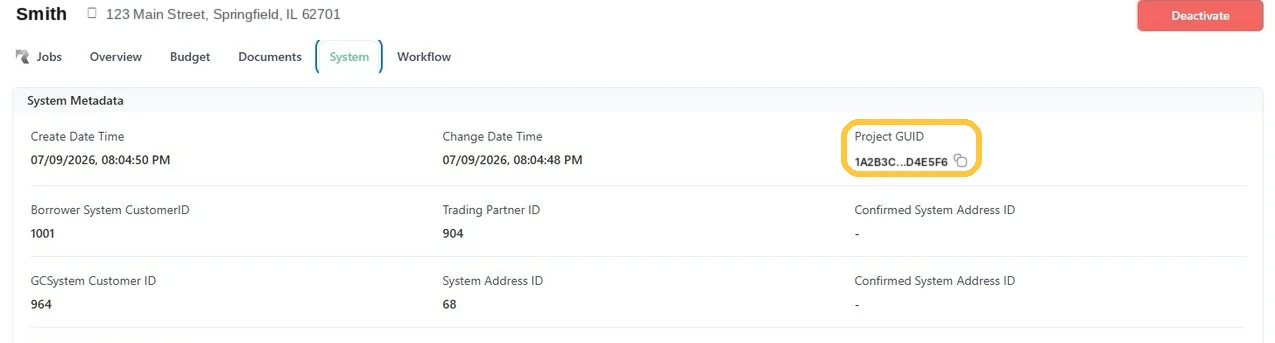
Copy it from System
The System tab shows the Project GUID and the created and changed dates, the audit trail for the record. Paste the GUID into any support request.
Tips
DO
- •Put the revision in the file name, for example "Plans Rev 2".
- •Include the Project GUID and the version number in support requests.
WATCH FOR
- •Files must be PDF, DOC, DOCX, XLS, or XLSX, up to 10 MB each.
- •Documents have no version history.
Troubleshooting
Use this guide with AI.
Ask RAZE AI here, or hand the plain-text guide to the assistant you already use.
Was this guide helpful?
Still stuck? Ask RAZE.
Ask RAZE AI for an instant answer from these guides, or send a request and the RAZE support team replies by email.
Ask RAZE AI.
Instant answers from these guides, any time.
Send a support request.
Tell us the product and guide; the form is here.
Call or email.